Putting together your very first website isn’t all that hard.
But it can certainly feel hard given the overwhelming number of options for site builders and web hosts there are—let alone the pages of content you’ll need to create.
After all, the last thing you—a busy copywriter—want is to spend a lot of hours, money and energy on something that you end up ultimately hating (and have to restart from scratch). Let’s be honest, even if you love what you build, you’ll probably want to change it up in a few years, or sooner.
Which is why we’ve put together this guide to help you get all the pieces in place to build your first (or possibly second… or maybe third) proper copywriter website.
Note: it’s common that you’ll end up not liking your first website. That’s okay… even expected. As you get better as a copywriter, you’ll want to go back and rewrite—even redesign—your site more than once. When that time comes, this guide will help you with the rewrite too.
Most of our recommendations here are based on what we’ve seen successful copywriters are currently using to run their businesses.
Here’s what this Guide to Building Your First Copywriter Website covers:
- Choosing your website platform.
- The basic pages to include in your website.
- Include credibility assets to boost your authority.
- Choosing the visuals for your site.
- Bonus tools to help you attract and engage clients.
- Beyond your website… foundations for a successful copywriting business.
Let’s get started…
1. Choosing your website platform.

First things first: You’ll need to decide where to build and host your website. For a basic copywriter website, there are two solid options.
Option #1: Keep it simple with a website builder.
The days of needing to know how to code in order to build a website are long gone. Today there are close to a dozen website builders that do the work for you. You simply choose a template, add a few photos and the copy and hit publish.
Website builders are best if you’re looking for a tool that’s easy to use, looks amazing (usually) and “just works”. They typically include all the basics to get started… pre-made templates, color schemes, and even extras like forms to make interacting with your website easier for your clients. And it’s all wrapped up in one low monthly fee.
Or there’s also…
Option #2: Customize your website with WordPress.
If you don’t mind a slightly steeper learning curve (and we do mean slightly) or getting a bit technical now and then, using WordPress for your site gives you complete control to customize everything. WordPress is an “open source content management system” that makes it easy to build and manage a website. It allows you to choose from hundreds of thousands of themes and plug-ins to help your website do just about anything.
Regardless of whether you choose a site builder or WordPress, you’ll get a great first website. But there are tradeoffs. Let’s look at the specifics of each option to help you choose which is best for you.
A closer look at using a website builder.
If you’re completely new to building websites (and want to go about things as painlessly as possible), going with a website builder like Squarespace or Wix makes things very easy. We know dozens of established copywriters who use these options. Here’s why they do:
You can design a beautiful website easily—without any coding or design experience whatsoever. Website builders have incredibly intuitive drag-and-drop user interfaces that help you to build your entire website out visually. What’s more, sites like Squarespace also provide mobile design options so your site looks just as good on a mobile device as it does on a laptop. You can design a beautiful website even if you know nothing about design.
Everything you need to build and host a fully functional website is included. Unlike WordPress, which requires you to figure your website infrastructure (hosting, domain name, themes, and plugins), website builders generally include everything you need under one roof (and you never have to worry about compatibility issues). Note: there are “builders” that can be added to WordPress (as you’ll see in a moment), but overall, they’re not quite as easy-to-use as those included with all-in-one web builders.
You’ve never alone if you have questions or need help. Websites like Squarespace and Wix have dedicated 24/7 customer support and security to help you take care of any questions or issues you might have. With WordPress, it’s just you and Google (actually there are dozens of support sites, so it’s not that hard to figure stuff out, but you do have to do the work). This may be a big deal if you get stuck and want someone to help.
Web Builders are incredibly affordable. The website builders we like offer packages for as little as $5-14 a month. Packages with more robust features range as high as $40/month. Given all that’s included, that’s an amazing value.
If using a web builder is the right option for you, we recommend these options:
- Squarespace (For best overall experience and themes.)
- Wix (For more flexible design and more features.)
- Zyro (Low budget option—but still looks good.)
All of these options allow you to set up hosting and domain name registration through their services. Depending on the plan you choose, the may also include the ability to take payment on site. And if none of these is a fit for you, open up Google and search for web builders. There are plenty of options.
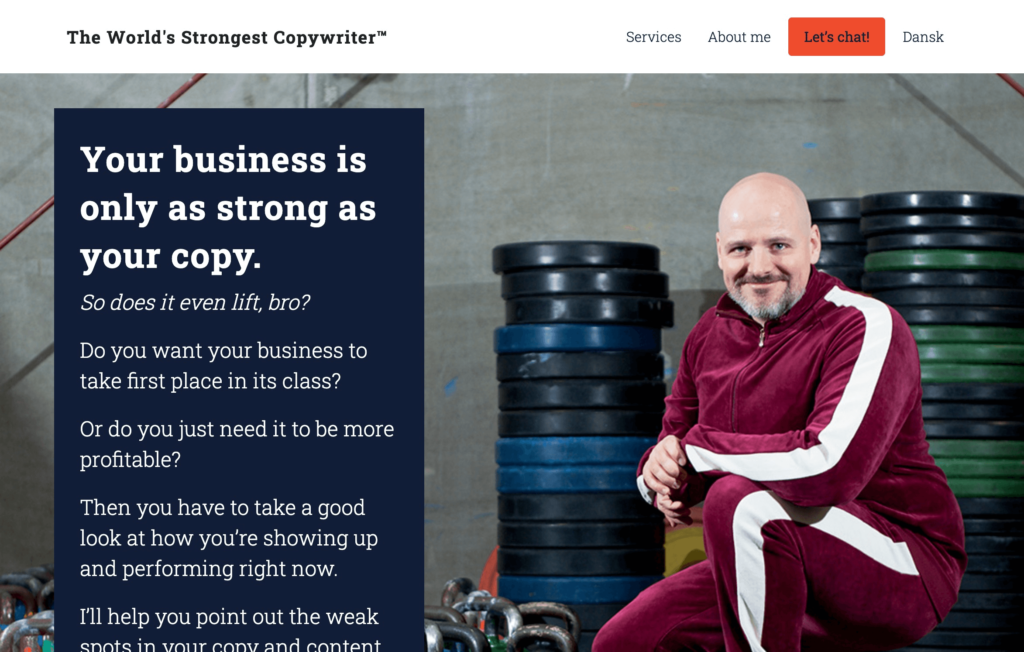
Some Examples of Copywriters Using Website Builders:

Not bad, right? But there are a few drawbacks to consider…
While web builders include a large range of templates and designs to get you started, you’re limited as to what you can do with your website. Adding any real customized code isn’t allowed and this often limits exactly what you can do with your website.
Want a larger border or to add another photo to the layout? Sorry, if it’s not in the template, you’re probably stuck. You can choose a different template or go without.
And, if you decide to move to a different platform in the future (because maybe you want more control some day?), you’ll have to start over from scratch. Most web builders allow you to export your text content (to import into your new website manager), but it’s not exactly intuitive. After all, they don’t want to make it easy for you to leave.
And that brings us to your second option…
Using WordPress for your website.
If you’re a complete beginner when it comes to websites or coding, WordPress might feel a little intimidating. But it’s not as difficult as it might seem at first. And because WordPress powers 40% of the world’s websites (SquareSpace and Wix have less than 2% each), there are hundreds of tutorials and articles online to help you navigate anything that seems hard.
There are very good reasons why many copywriters take the more advanced route upfront (or later on):
You get waaaaay more customization. If you understand or can figure out the code—it’s not that hard and you can hire a pro if you need help—Wordpress offers a lot more flexibility when it comes to the design and function of your site. You can make it whatever you want it to be. WordPress sports an ever-growing collection of plugins and themes to choose from—literally thousands of options—whereas with sites like Squarespace, you’re boxed in with their smaller, curated collection of options. The downside with WP is that some plugins and themes don’t play nice together, but deactivating a conflicting plug-in will usually fix any issues.
Your website is entirely in your control. If you ever want to move your WordPress site to another web host provider (to take advantage of better speeds, pricing, or service), there’s nothing to stop you. After all, it is your website and content. With site builders like Squarespace or Wix, you’re stuck with the parameters they decide for you and everyone else in their user base. You may be able to export your copy or images, but you’ll have to rebuild everything at your new host.
It’s the best option for SEO and blogging. If your marketing strategy includes creating blog content that ranks well on search engines, then you’ll definitely want to consider a WordPress site. While sites like Squarespace and Wix have their own SEO tools, they’re a little basic compared to WordPress and its popular SEO plug-ins, (especially Yoast). Experienced bloggers like Ryan Robinson and Jon Morrow both recommend WordPress for blogging (and if anyone knows, it’s those two).
Now… if you decide to take the WordPress route, there are a few extra steps to figure out—like hosting, domain name registration, and a design theme.
Choosing a web host and registering your domain name.
Unlike Squarespace and Wix, WordPress doesn’t include hosting, domain name registration, or a security certificate. So before you build out your WordPress website, you’ll need to get all of that sorted out. Start by signing up with a hosting provider. Most web hosts can help you set up your hosting plan, your domain name and security certificate with a few clicks. And there’s no shortage of options to choose from.
We spent hours drawing up comparisons and narrowed the host choices down to these 3 for anyone who’s just starting out:
- Bluehost (For overall value and ease of use.)
- Siteground (For faster loading speeds and better security.)
- GreenGeeks (For eco-friendly hosting.)
All of these options offer domain name registration and an SSL Certificate for your website as well. So whichever you go with, you’ll be able to check those boxes off easily.
Each of these hosting options provides simple tutorials for setting up your site.
Some people like keeping the domain name registration separate. In that case, we recommend GoDaddy. Click here to save 30% on a new domain name registration.
Pro Tip: when choosing your domain name, consider what your clients will type into Google to find you… in most cases it will be your name, but it could be something like “copywriter” and your niche, like “SaaS copywriter” or “copywriter for coaches”. If you can, purchase a domain name that helps your best clients find you with a simple search.
Once you’ve got your domain name, it’s time to pick a WordPress Theme to use to build out your website.
Choosing a WordPress theme.
While WordPress isn’t technically a website builder like Squarespace or Wix (it’s a content management system), it does include a number of free themes. But they’re kind of basic. Fortunately WP fans have built hundreds of themes that you can install which let you create a perfectly acceptable website (no coding required).
But even with thousands of themes to choose from, you might want something more customizable. And that’s where WordPress site builders come in. They include hundreds of their own themes, and layer on customization features so you can truly create something that’s yours alone.
We’ve done a bit of homework for you and narrowed it down to these 3 options based on what we’re seeing top copywriters using:
- Elegant Themes (Divi) (For beautiful layouts and a more user-friendly experience.)
- Elementor (For more advanced customization options.)
- GeneratePress (For overall better website performance.)
When you add these theme builders to your WordPress site, they function a bit like the web builders we mentioned earlier. They certainly make WordPress easier to use and customize. Once you’ve installed your favorite, check out the user guides provided by the creators to customize a theme template, add plug-ins, and start building your website.
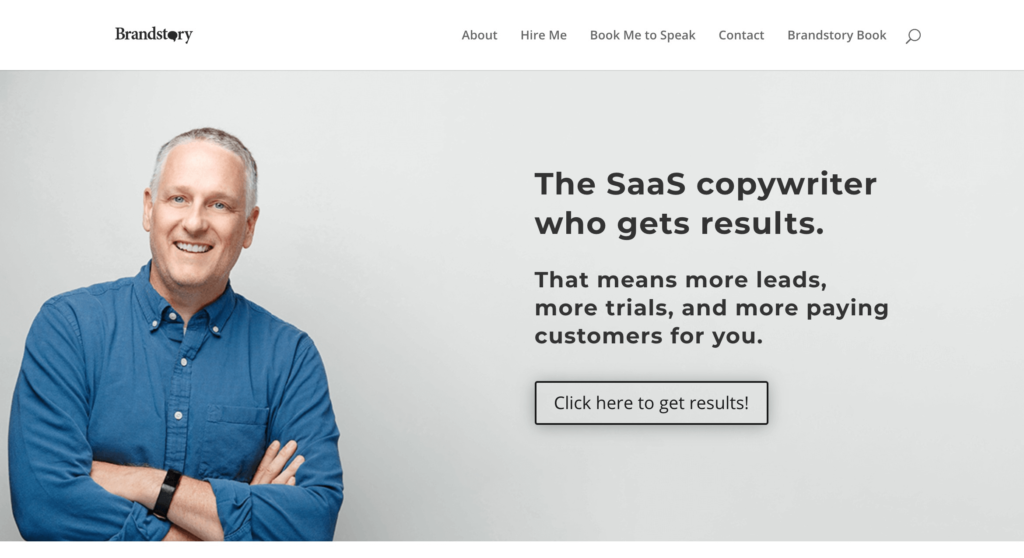
Some Examples of Copywriters Using WordPress Websites:
Custom programming with WordPress. If you don’t like any of the thousands themes available to use with WordPress, you can also hire a graphic designer to create a unique design for your website. Then, after you have a design you love, hire a programmer customize your own theme in WordPress. This is what we’ve done with The Copywriter Club website (we worked with Shauna at We Are Branch for the design and Alchemy + Aim for the programming). Often your designer will have 2-3 programmers they’ve worked with if you need a reference.
But before you can hire a designer to work on your brand and design, you’ll need to figure out your sitemap (the pages you want on your site), and get the pieces in place.
Which us leads to…
2. The basic pages to include in your website.

After you’ve figured out your website’s tech setup, you’ll want to take some time to map out the site structure and the individual pages that fit into it. To keep it simple, there are a few fundamental pages and sections copywriters should consider for their websites:
• Homepage and hero section
• About page
• Services/work with me page
• Process page
• Contact page
• Blog
• Legal (but necessary) pages
Let’s talk a bit about each of these pages and what you might want to include as you write yours (and of course, we’ll take a look at some examples).
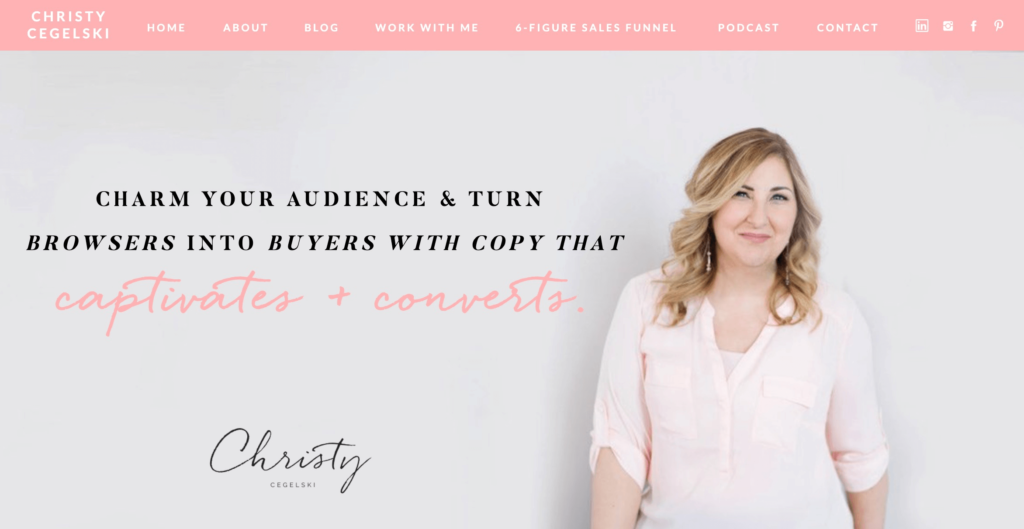
Your homepage and hero section.

First impressions matter. And since your homepage will (usually) be the entry point for newcomers to your business, you’ll want to make sure you start things off right with a clear and compelling hero section.
There’s no official way to approach your hero section, but what we like to recommend for copywriters is featuring:
- A high-quality photo of you so people can put a face to the name (humans like seeing and working with other humans and having a photo at the top of your site helps them get to know and like you).
- A clear headline that makes a big promise and a bit of copy to establish how you deliver on your promise and who specifically should hire you. Don’t settle for a headline that’s just your name and title. Or a bland statement of the kind of work you do. What’s the big problem you solve for your clients? That should be your headline.
- A call-to-action. Not all copywriters do this. But linking to your services/work with me page or intake form (or a lead magnet if you’ve got one ready) from the top of your website can get the sales process started.
As for the rest of your homepage, you’ll generally want to take some space to clearly introduce you, your brand, and talk more about the problem you solve and how you do that. Then link to your site’s best resources (it might be your services page, blog posts filled with free ideas, or information about how to work with you). Finally, include an opt-in to capture emails (usually by offering a valuable ‘freebie’ in exchange.)
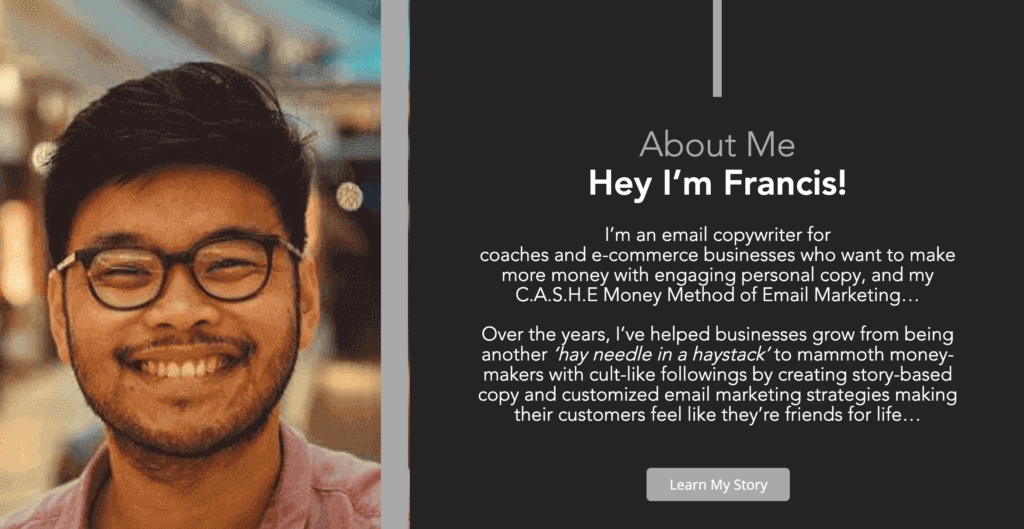
Your about page.
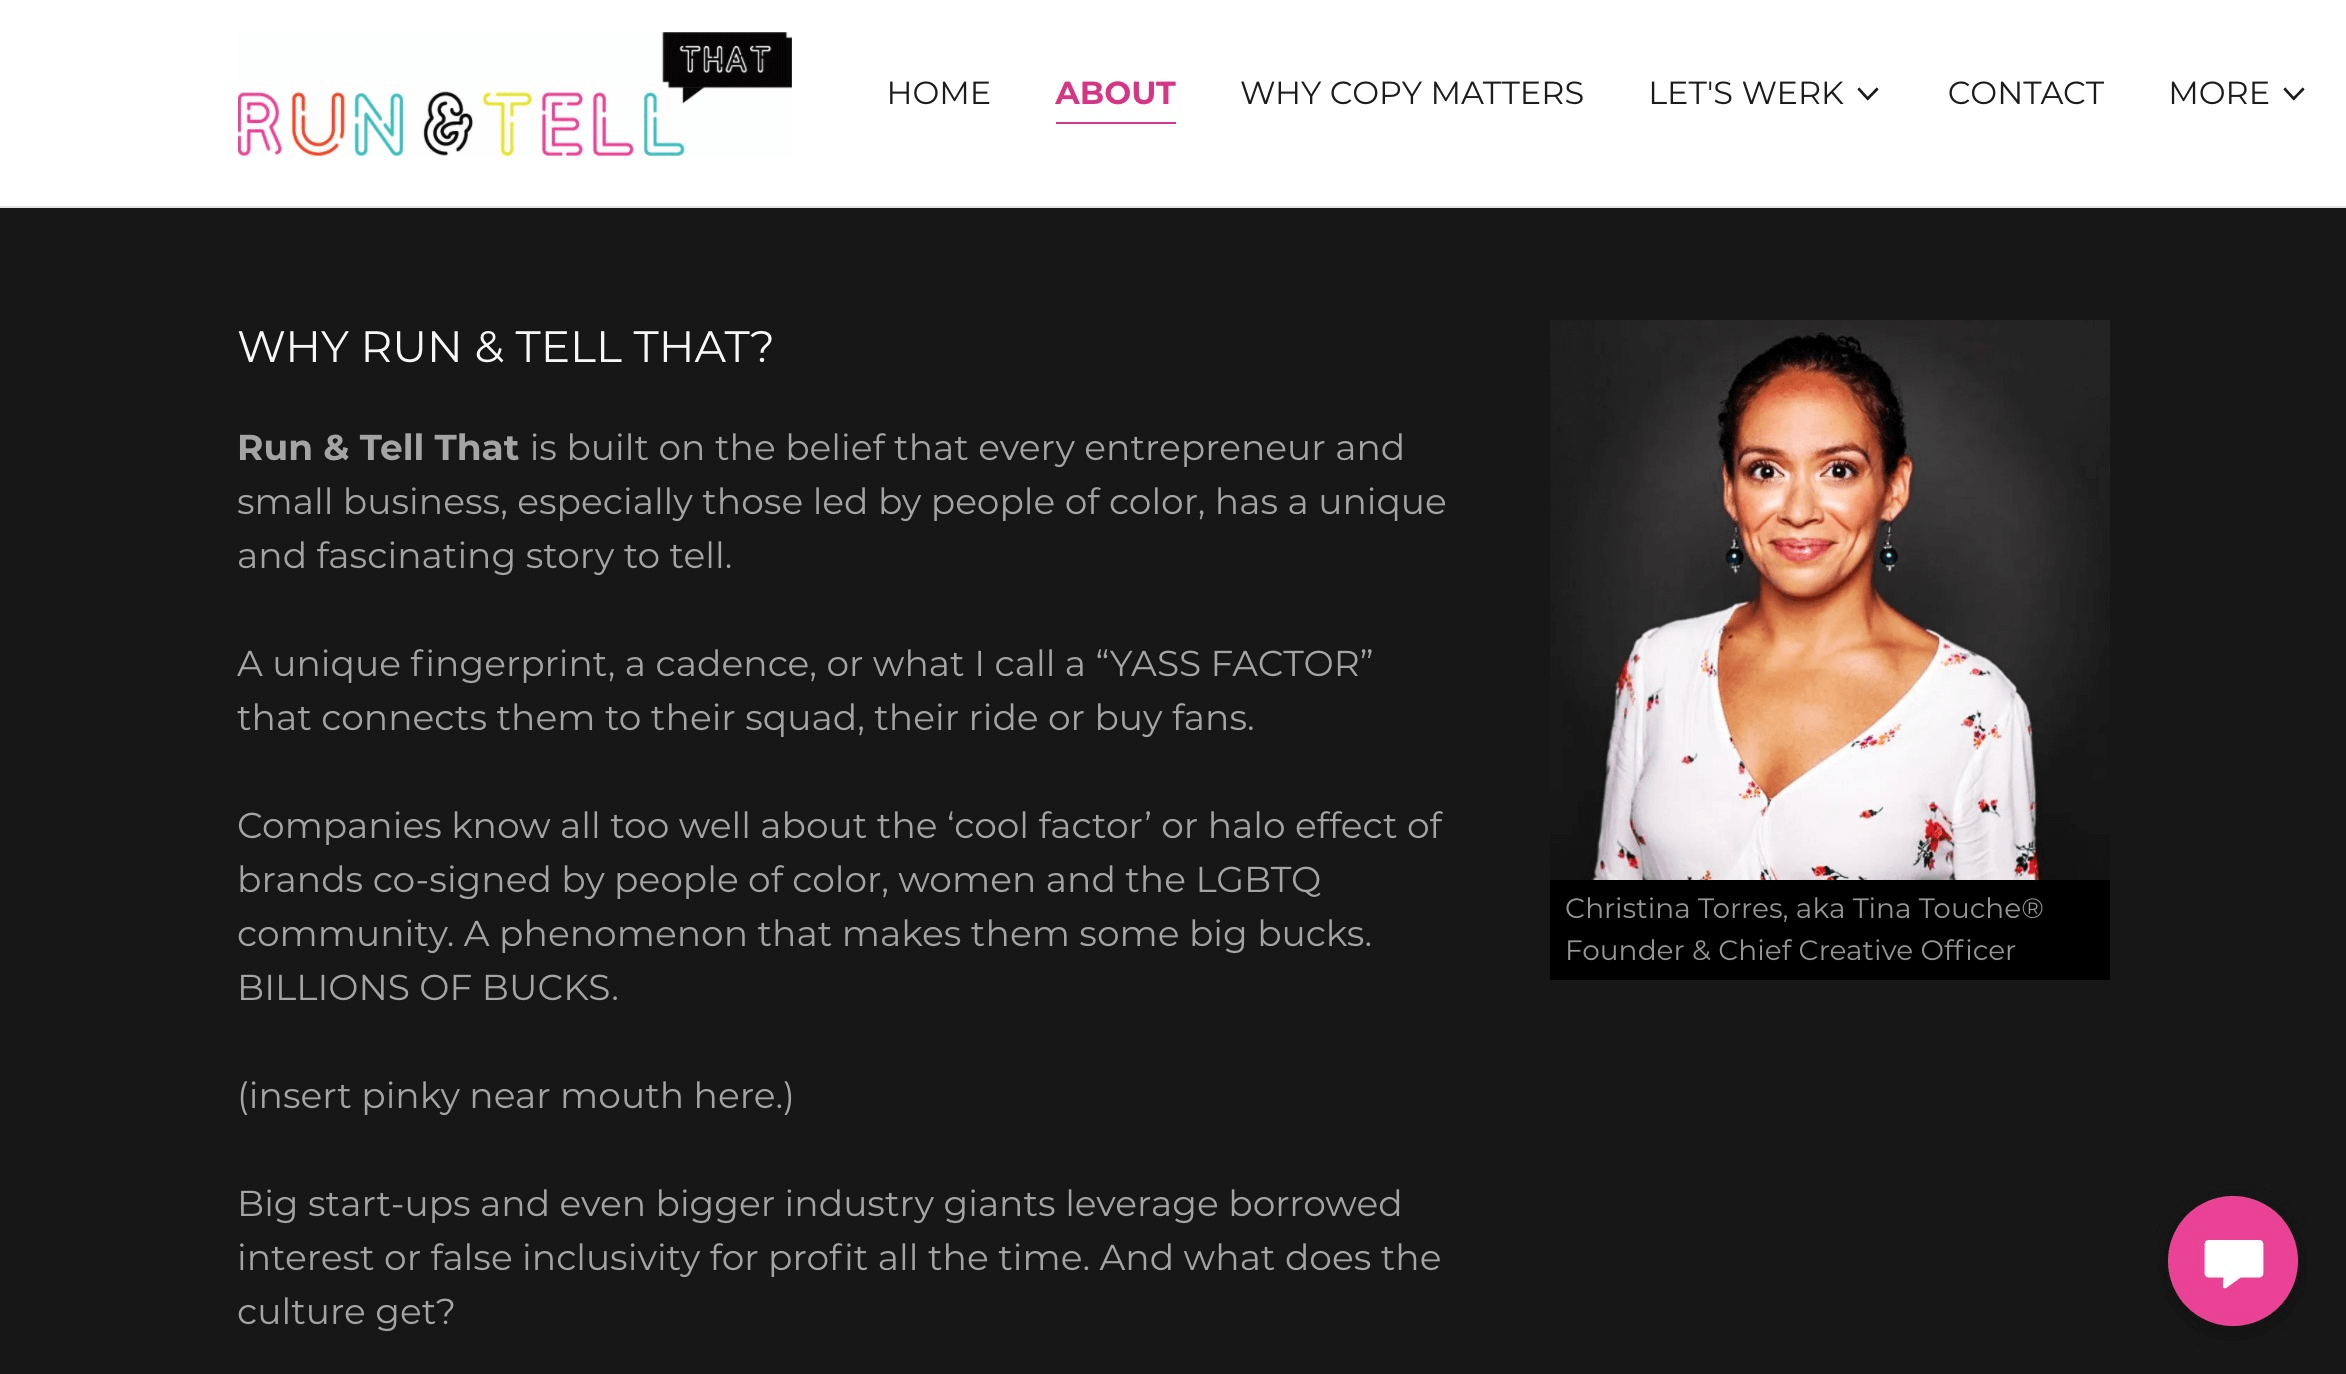
Generally speaking, About Pages are the second most visited pages on your website right after the Homepage. People want to know who’s behind your business right away.
Given the label, it seems like this page is where you get to tell everyone all about who you are and why you’re awesome. And to some extent, that IS what you should be doing. However…
The best About pages—and by best, we mean the ones that convert prospects into clients—actually talk more about your customer, their challenges, and how you and your work fit into their overall story. They address your prospect’s problem and how your process or solution perfectly solves it.
And your About Page introduces you as the expert they need to hire (be sure to include a picture or two… we’re repeating ourselves here but people want to know who they’re working with). You can safely skip the story about how you started writing poetry in the 7th grade or worked for your college newspaper and focus instead on the stuff that builds your credibility—awards, recognition, credentials, and even a short testimonial or two.
Finally, be sure to include a call-to-action. What do you want your prospect to do next? Book a call? Complete your intake form? Choose a package? Tell them to do it.
Your services/work with me page.
This is arguably the second most important page on your website (given that most of your calls-to-action will lead people here). Usually what works best for these pages is to list out 2-3 of your services (either your most profitable packages or the work you want to do most—better still if they’re the same), explain them for a bit. Then either link to separate pages for each where you expand on them individually in greater detail, or link to an intake form so prospects can get started on a new project.
Otherwise, here’s some best practices for putting together services pages.
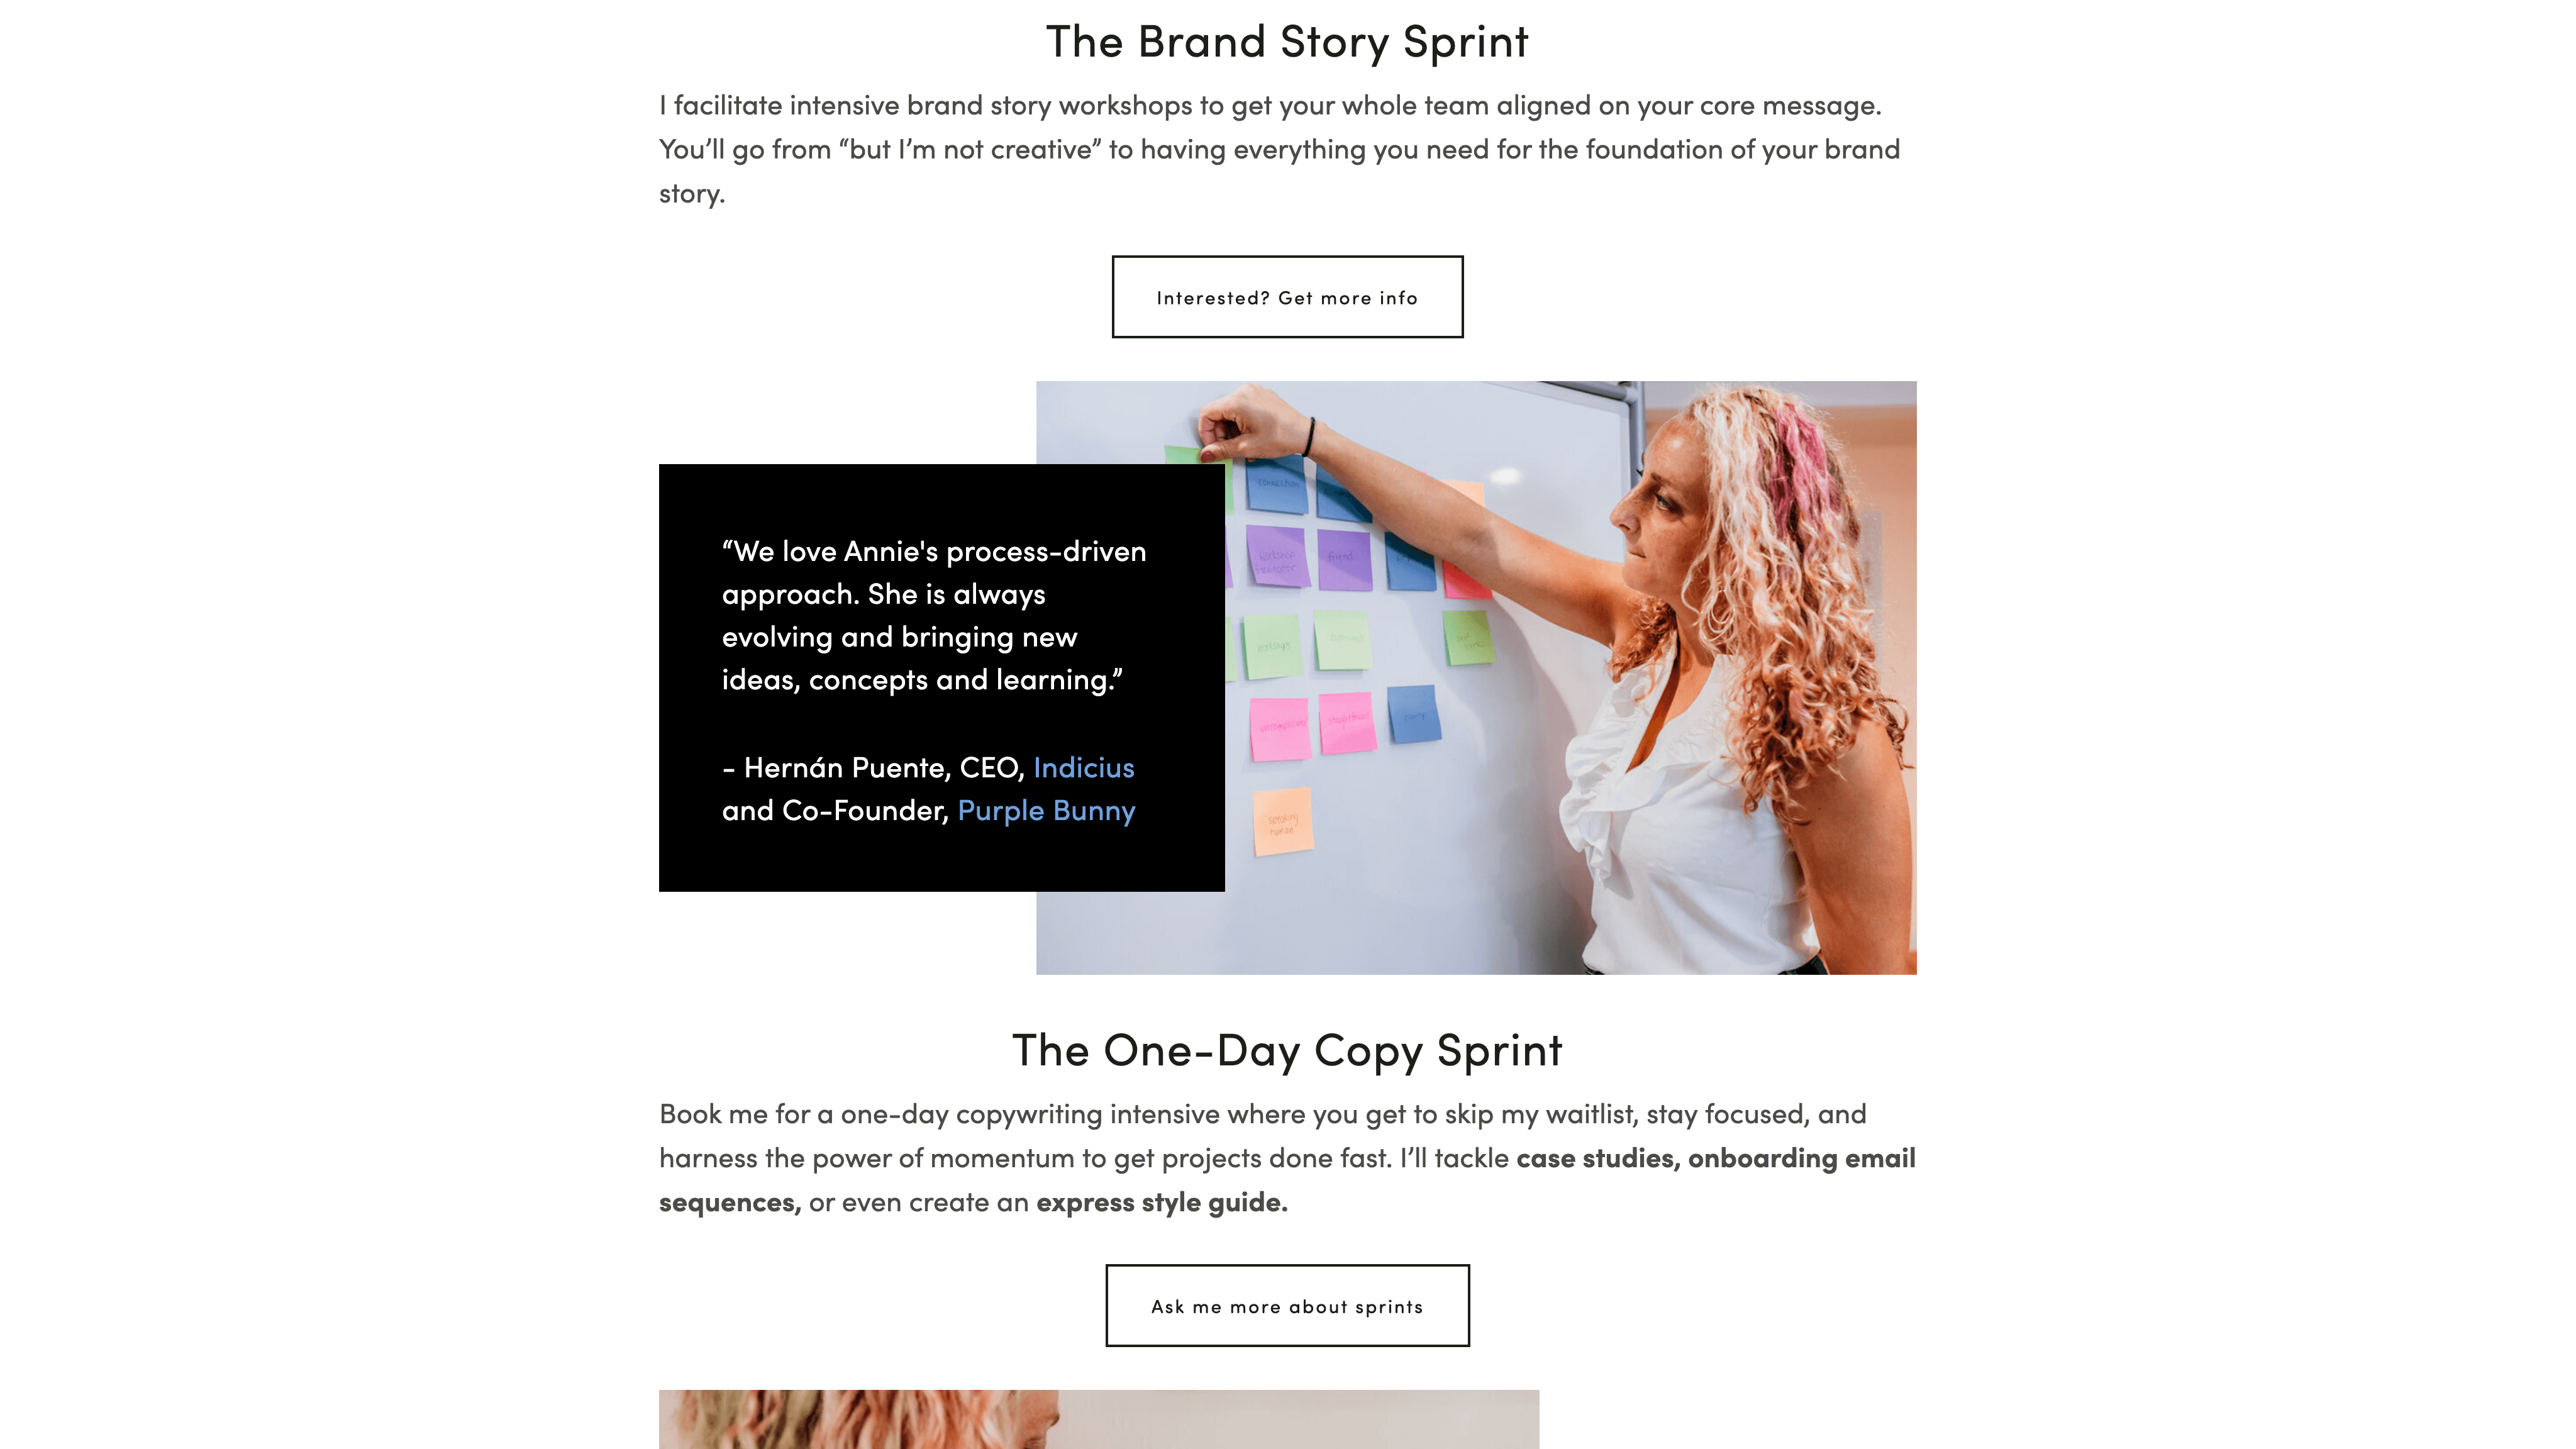
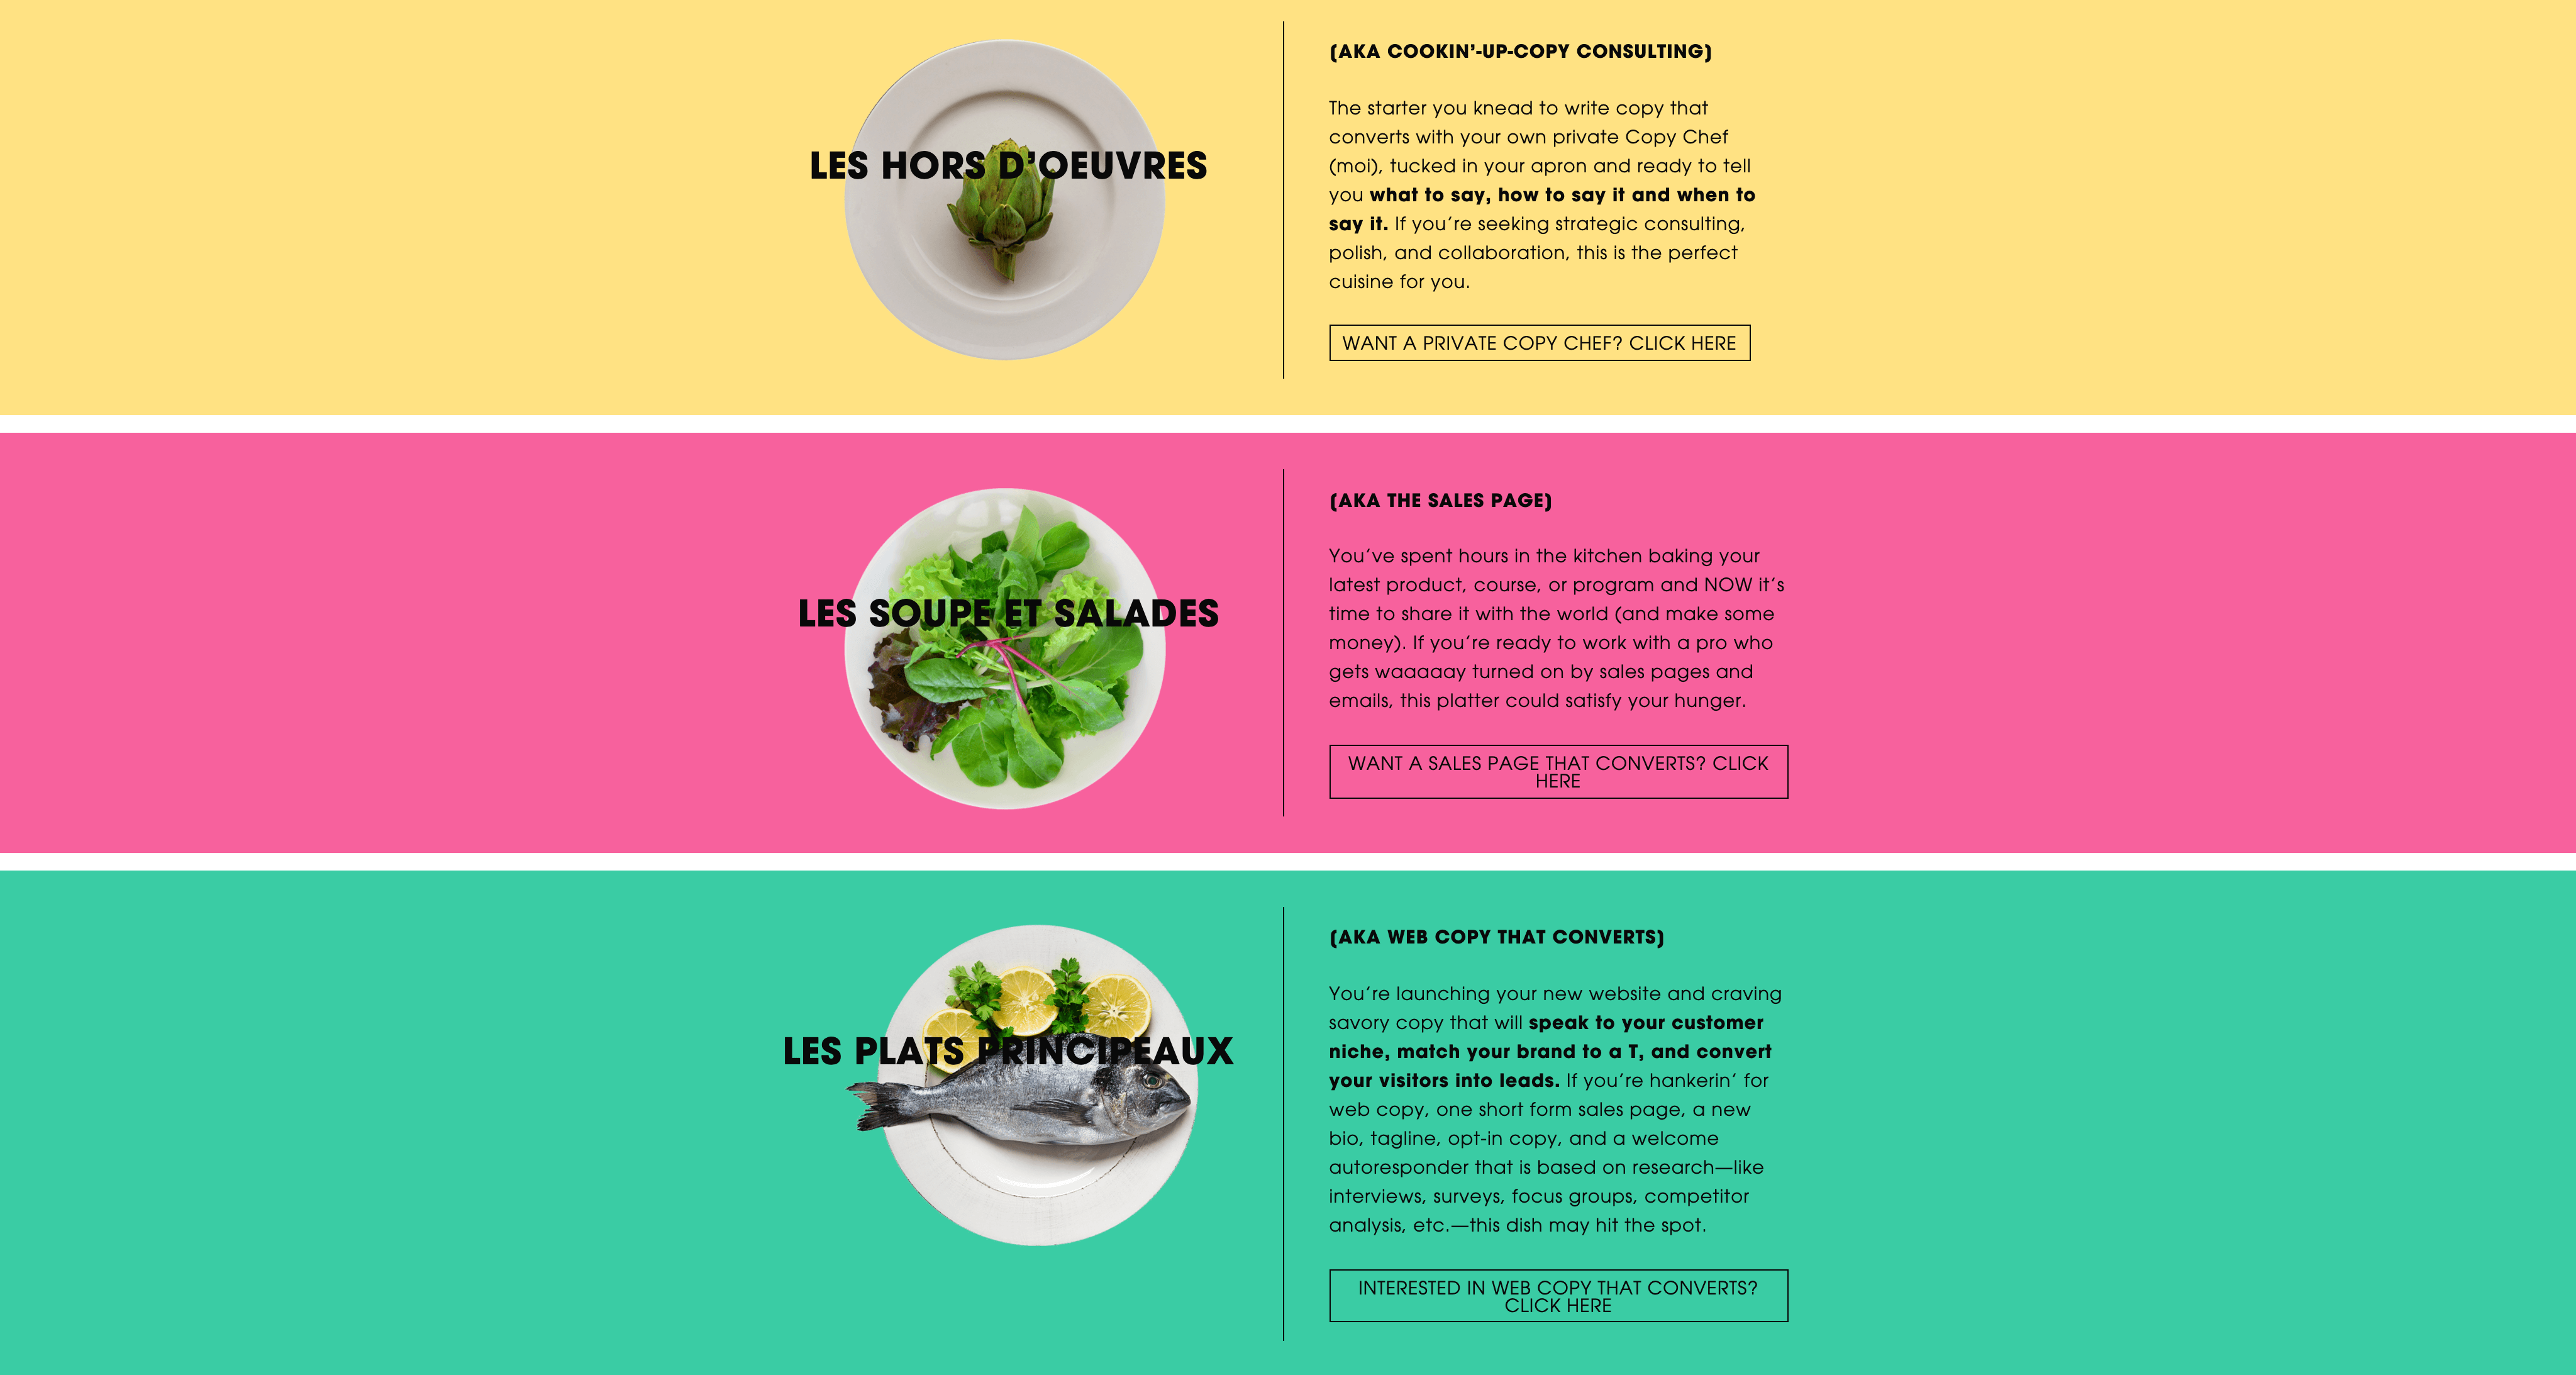
Stand out with branded services. In a sea of copywriters who are all offering the same deliverables, it’s worth standing out to your prospects with services that are fun, memorable and distinct. Choose unique names for your products to help them stand out. Here’s how Kira Hug does it on her site:
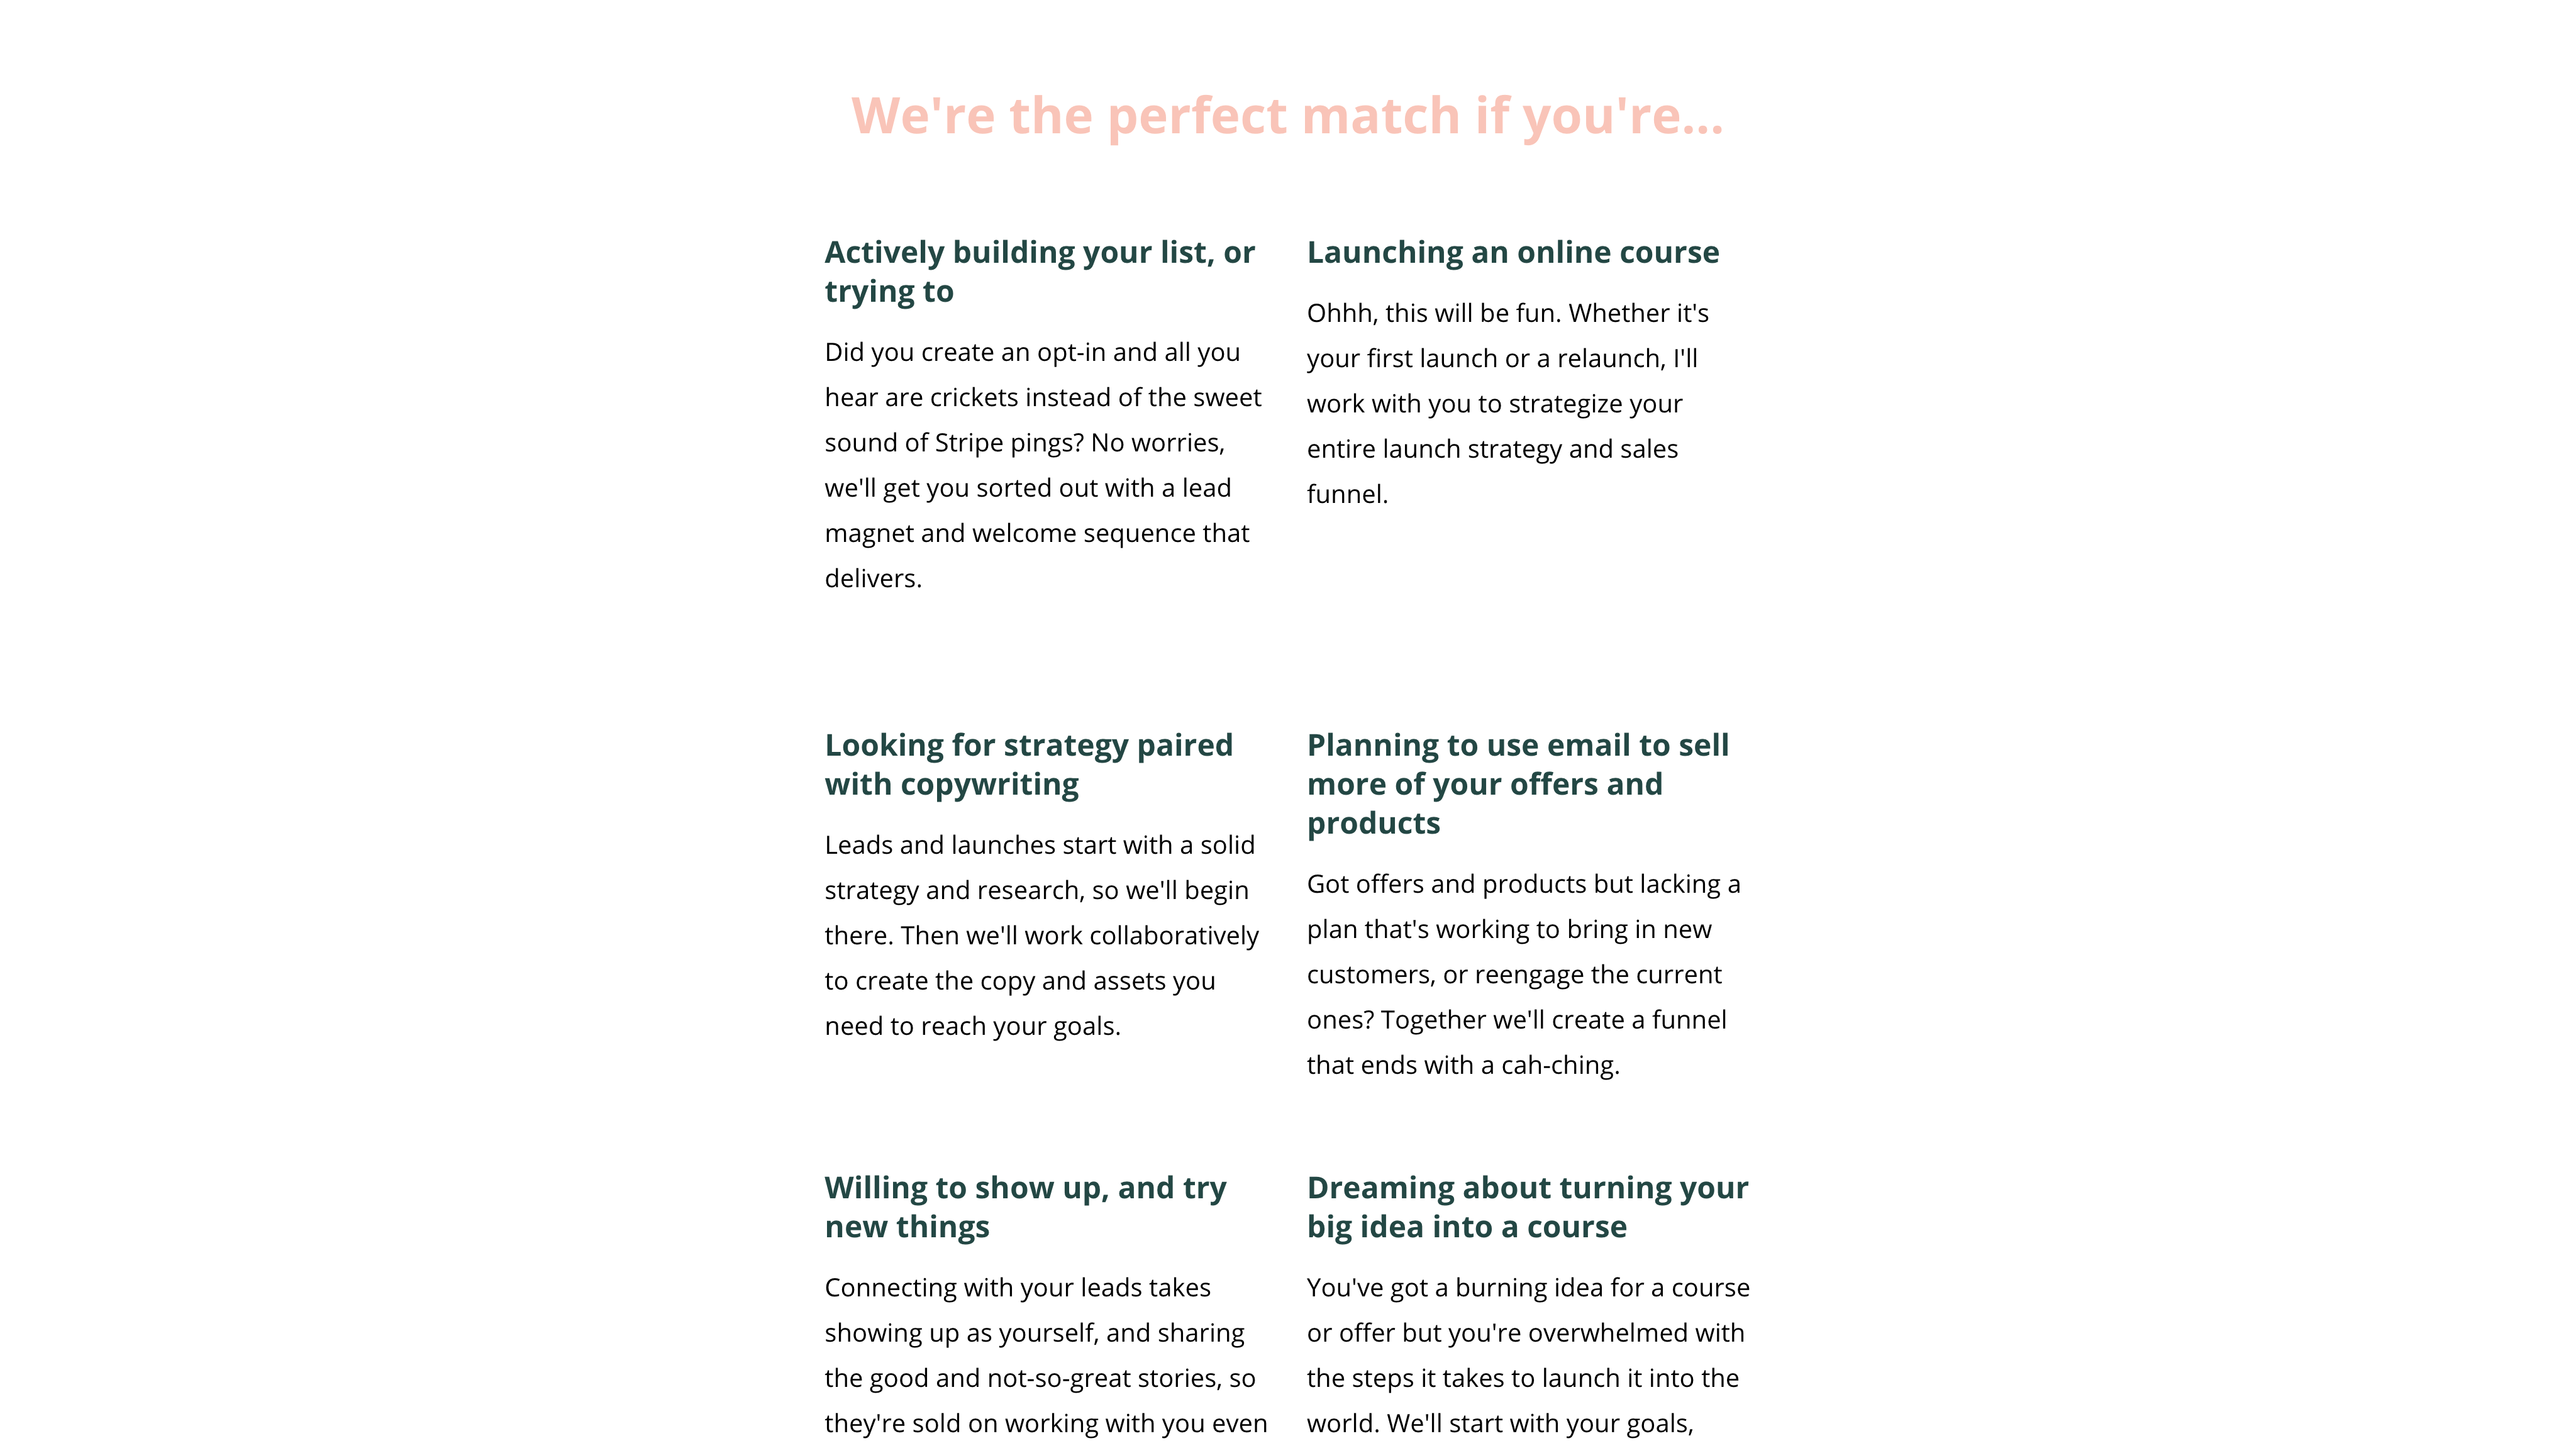
Remove the guesswork for your readers by putting your services in context. It’s not enough to just list out your services. Instead, you want to make it clear what problems you solve and who you solve them for. Make it easy for the right people to reach out and reduce the odds of you getting leads that are bad fits for your business by clearly explaining what you do. Sara Vartanian does a good job of helping her ideal clients see if they’re a fit:
Let past clients do the heavy lifting for you. Strategically placing testimonials and case studies that match the services you’re selling is a good move for increasing interest in your services so you close more deals.
Your process page.
Want clients to know you’re an expert from the moment they land on your website? Then think seriously about adding a process page. If you’re relatively new as a copywriter, you might not have work samples to demonstrate you’ve helped clients solve their problems before. You might not have testimonials or case studies.
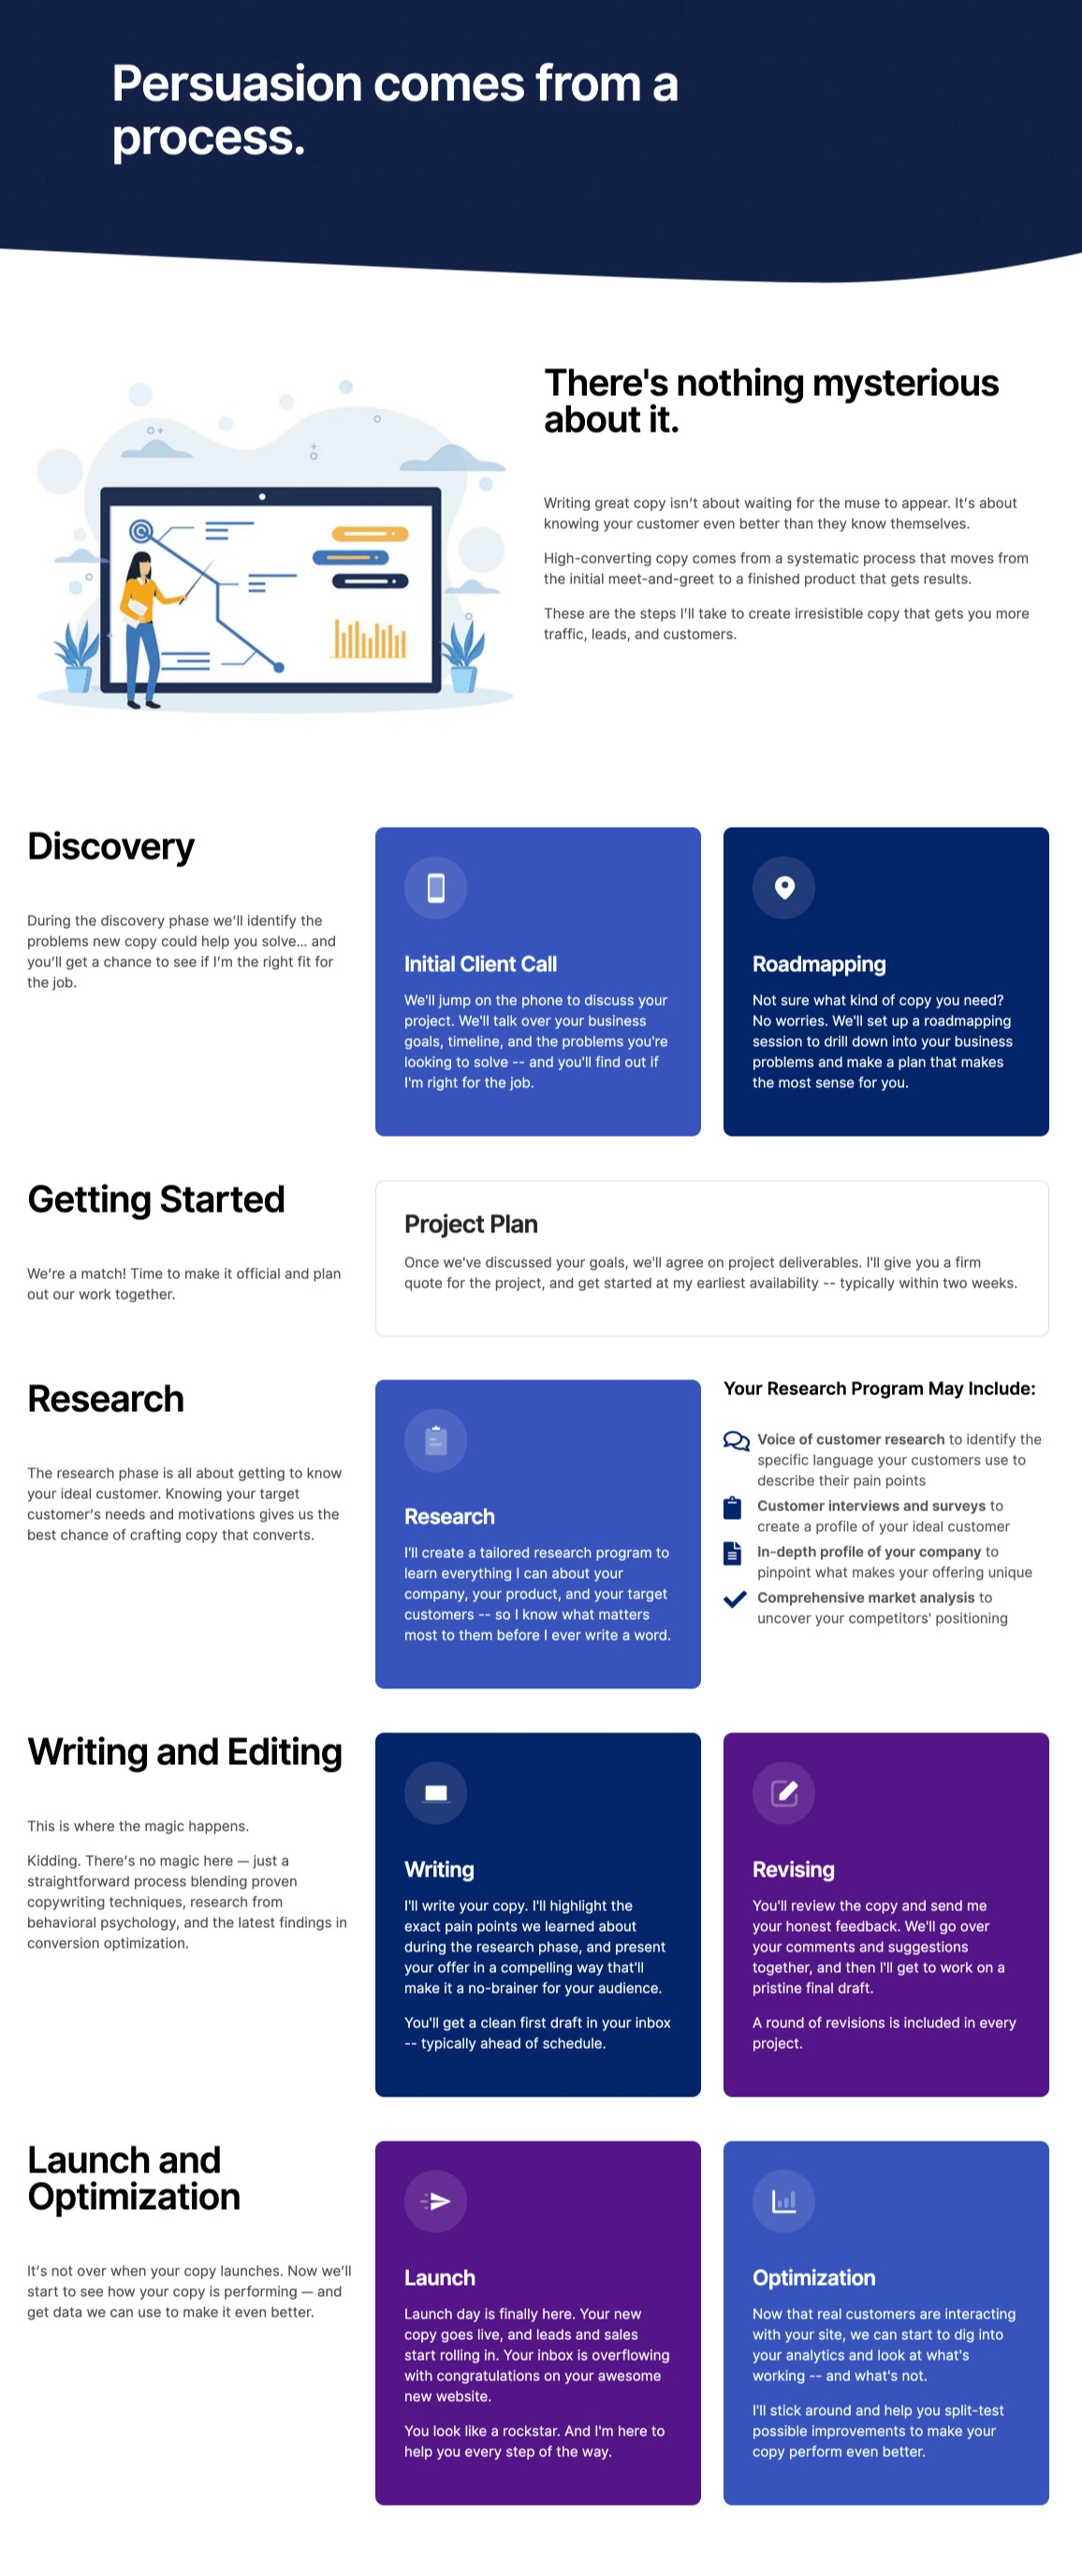
But you can show you’re a professional by adding a detailed process page to your site. As clients walk through your process, step-by-step, they learn how you’ll achieve results for them. On this page, explain exactly how you work with people, from research to copywriting to optimization (or whatever your process includes). When you do this, you build trust by substantially reducing the uncertainty in your reader’s mind about what they can expect when they move forward with you. And when there’s less uncertainty, clients buy more confidently. Look how copywriter Chris Collins outlines his process:
Your contact page.
Contact pages are pretty standard and almost every website has them. If you’re using a website builder, there are default form tools you can easily use to set things up. If you’re using WordPress, there are form plugins you can install that are also straight-forward to configure.
Otherwise, if you’re looking for more advanced features, there’s a few form tools we recommend below in the Client Intake Forms section below. Be sure to include your preferred method for clients to contact you—probably email—and share the rules for contacting you making a note of things like:
• Minimum project rates
• Expected timelines for scheduling a project
• Availability dates
• “Best Fit” project details
• Any other details to rule out bad fits.
Your Blog.
For many copywriters, having a blog section for sharing articles on their website is important. You’ll probably want one if you’re:
Selling content (or affiliate offers) as part of your services. In which case, your blog is a kind of portfolio piece that potential customers will most likely want to check out before committing to a project. And it’s where you’ll link to affiliates.
Trying to rank in search with SEO content. If this is a goal of yours, having a blog is a no-brainer and an important part of your website. The more great content you post, the more potential clients will find you. Again, if this is a big part of your overall strategy, we recommend sticking to WordPress. If you move to a new site later, you’ll lose a good number of links to your content which can cause a dramatic drop in search results.
Looking to fully control your content. While you could blog on sites like Medium or LinkedIn, you’ll always be at the mercy of whatever they decide to do with their platforms. Which is why if you want to own your content for the long-term, it’s always better to set up a home base and stay off rented land. Even if you do post on LinkedIn, Medium, or other platforms, posting a back-up copy to your own blog can be a good move. In fact, post it on your own site first, then cross post it on another site with a link back to your site to capture potential traffic.
Building your long-term authority. When someone finds your blog and sees tons of valuable posts from across the years, it immediately signals to them that you’re not just a random newbie. But that only happens if you start today and keep contributing to it on a consistent basis.
Your legal (but necessary) pages.
Every website needs a few legal policies and disclaimers to protect you, the business and your customers. What’s more, they’re actually quality signals to Google and other search engines. You see pages like these tucked away in the footer as things like:
• Terms & Conditions
• Privacy Policy
• Cookie Policy
• GDPR and other email contact policies
The exact language that goes on each of these generally depends on the sort of business you’re operating, where you’re based, and how your website uses tools and software to collect data from its visitors. Here’s how the beginning of The Copywriter Club‘s Privacy Policy reads:

In terms of coming up with content for your legal pages, there are online resources that provide templates and can generate the copy automatically (some are free and others paid).
And to be clear, we are not attorneys.
This is just general information so that you can take the necessary steps to make sure you’re compliant with the law in your area. As is always the case when it comes to legal questions, your best bet is to work with a lawyer and have them make the language as bulletproof as possible for your specific situation.
In the meantime, here are two resources that can help meet these requirements and even offer some immediate and affordable solutions:
TermsFeed — T&C agreements, End User Agreements, Privacy Policies and more.WebsitePolicies— offers similar products.
3. Include credibility assets to boost your authority as a copywriter.

The next step is adding elements to your site to build or fortify your authority as an expert copywriter. These are various things that quickly communicate you know what you’re doing and can help move prospects toward the sales. They include:
• Client logos
• Public appearances
• Recognized certifications
• Client testimonials
• Case studies & samples
Let’s look at each one (along with a couple of examples)…
Client logos.
Client logos are awesome because—in one quick glance—they establish that you have experience. If the logos you feature speak to your niche and ideal clients, even better. If you’ve worked with a few clients (and have access to their logos), it’s worth putting them on your home and about pages (as opposed to having nothing there at all). It’s a good idea to include a clause in your contract that specifically allows you to use the clients name or logo in your marketing to avoid any legal backlash later on. Looks at this sweet logo bar at ChrisCollins.com:
Public appearances.
If you’ve appeared on podcasts, guest blogged for a big publisher (like Forbes or Business Insider), or spoken on stage at big events (or even virtual events like this event for copywriters), then you’ll definitely want to showcase those as well. Ask the even organizer if they have any photos from the event you can use. Or better still, have a friend or photographer come to the event to shoot you on stage (you should get permission from the event organizer if you do this).
And if you haven’t done any of these authority building activities yet, you should definitely start thinking about it. Because doing any of those will immediately put you in a different league from all the other copywriters in the world—making you the kind of writer clients come to with better projects and bigger budgets.
Recognized certifications.
If you’ve had copywriting training or education done by a widely recognized and respected brand (like, ahem, The Copywriter Club), then it’s worth throwing those on your site as well. Most clients don’t really understand what these certifications represent (so don’t worry too much if you don’t have them), but it doesn’t hurt to show that you’ve put in the work. Here’s how Annie Bacher shows off her certs:

Client testimonials.
Testimonials are fantastic. When done well, they help your prospects see that others like them have had a good experience and outcome after working with you. So use client testimonials strategically. By that, we mean:
Sprinkle them near conversion hotspots. Around your services pages, checkout pages, and pretty much anywhere where it’s closest to the sale.
Use written testimonials in addition to video. People can skip playing videos altogether. But their eyes will be exposed to at least some of the message if it’s written instead. If you’re using videos, pull out a quote from the testimonials and use it as a title or headline. Choose a second quote from the transcript and use it as a caption on the thumbnail image that shows before your prospect hits “play”.
Use visual hierarchy to reel prospects in. Bold, italics, color, or increasing the font size on key parts of your testimonial makes it practically impossible for readers to ignore your praise.
Include full names, smiling headshots, and job titles or locations if possible. The more real and relatable your past clients feel to your prospect, the better. They should see themselves in the testimonials you share. Here are a few testimonials from copywriter Sophia Dagnon’s site:
Case studies and samples.
Like testimonials, case studies are among the best assets a copywriter (or any business for that matter) can have as part of their marketing. They’re testimonials on steroids. Case Studies are even more powerful as they can walk through the challenge, your approach to the project, the strategic ideas you came up with, how you implemented them, and the results you achieved for your clients.
If you’ve got a project that went extremely well (and metrics that you’re allowed to share), it’s well worth it to take some time to flesh out the experience and feature it on your website. Here’s how Alyssa Goulet shows off her case studies:
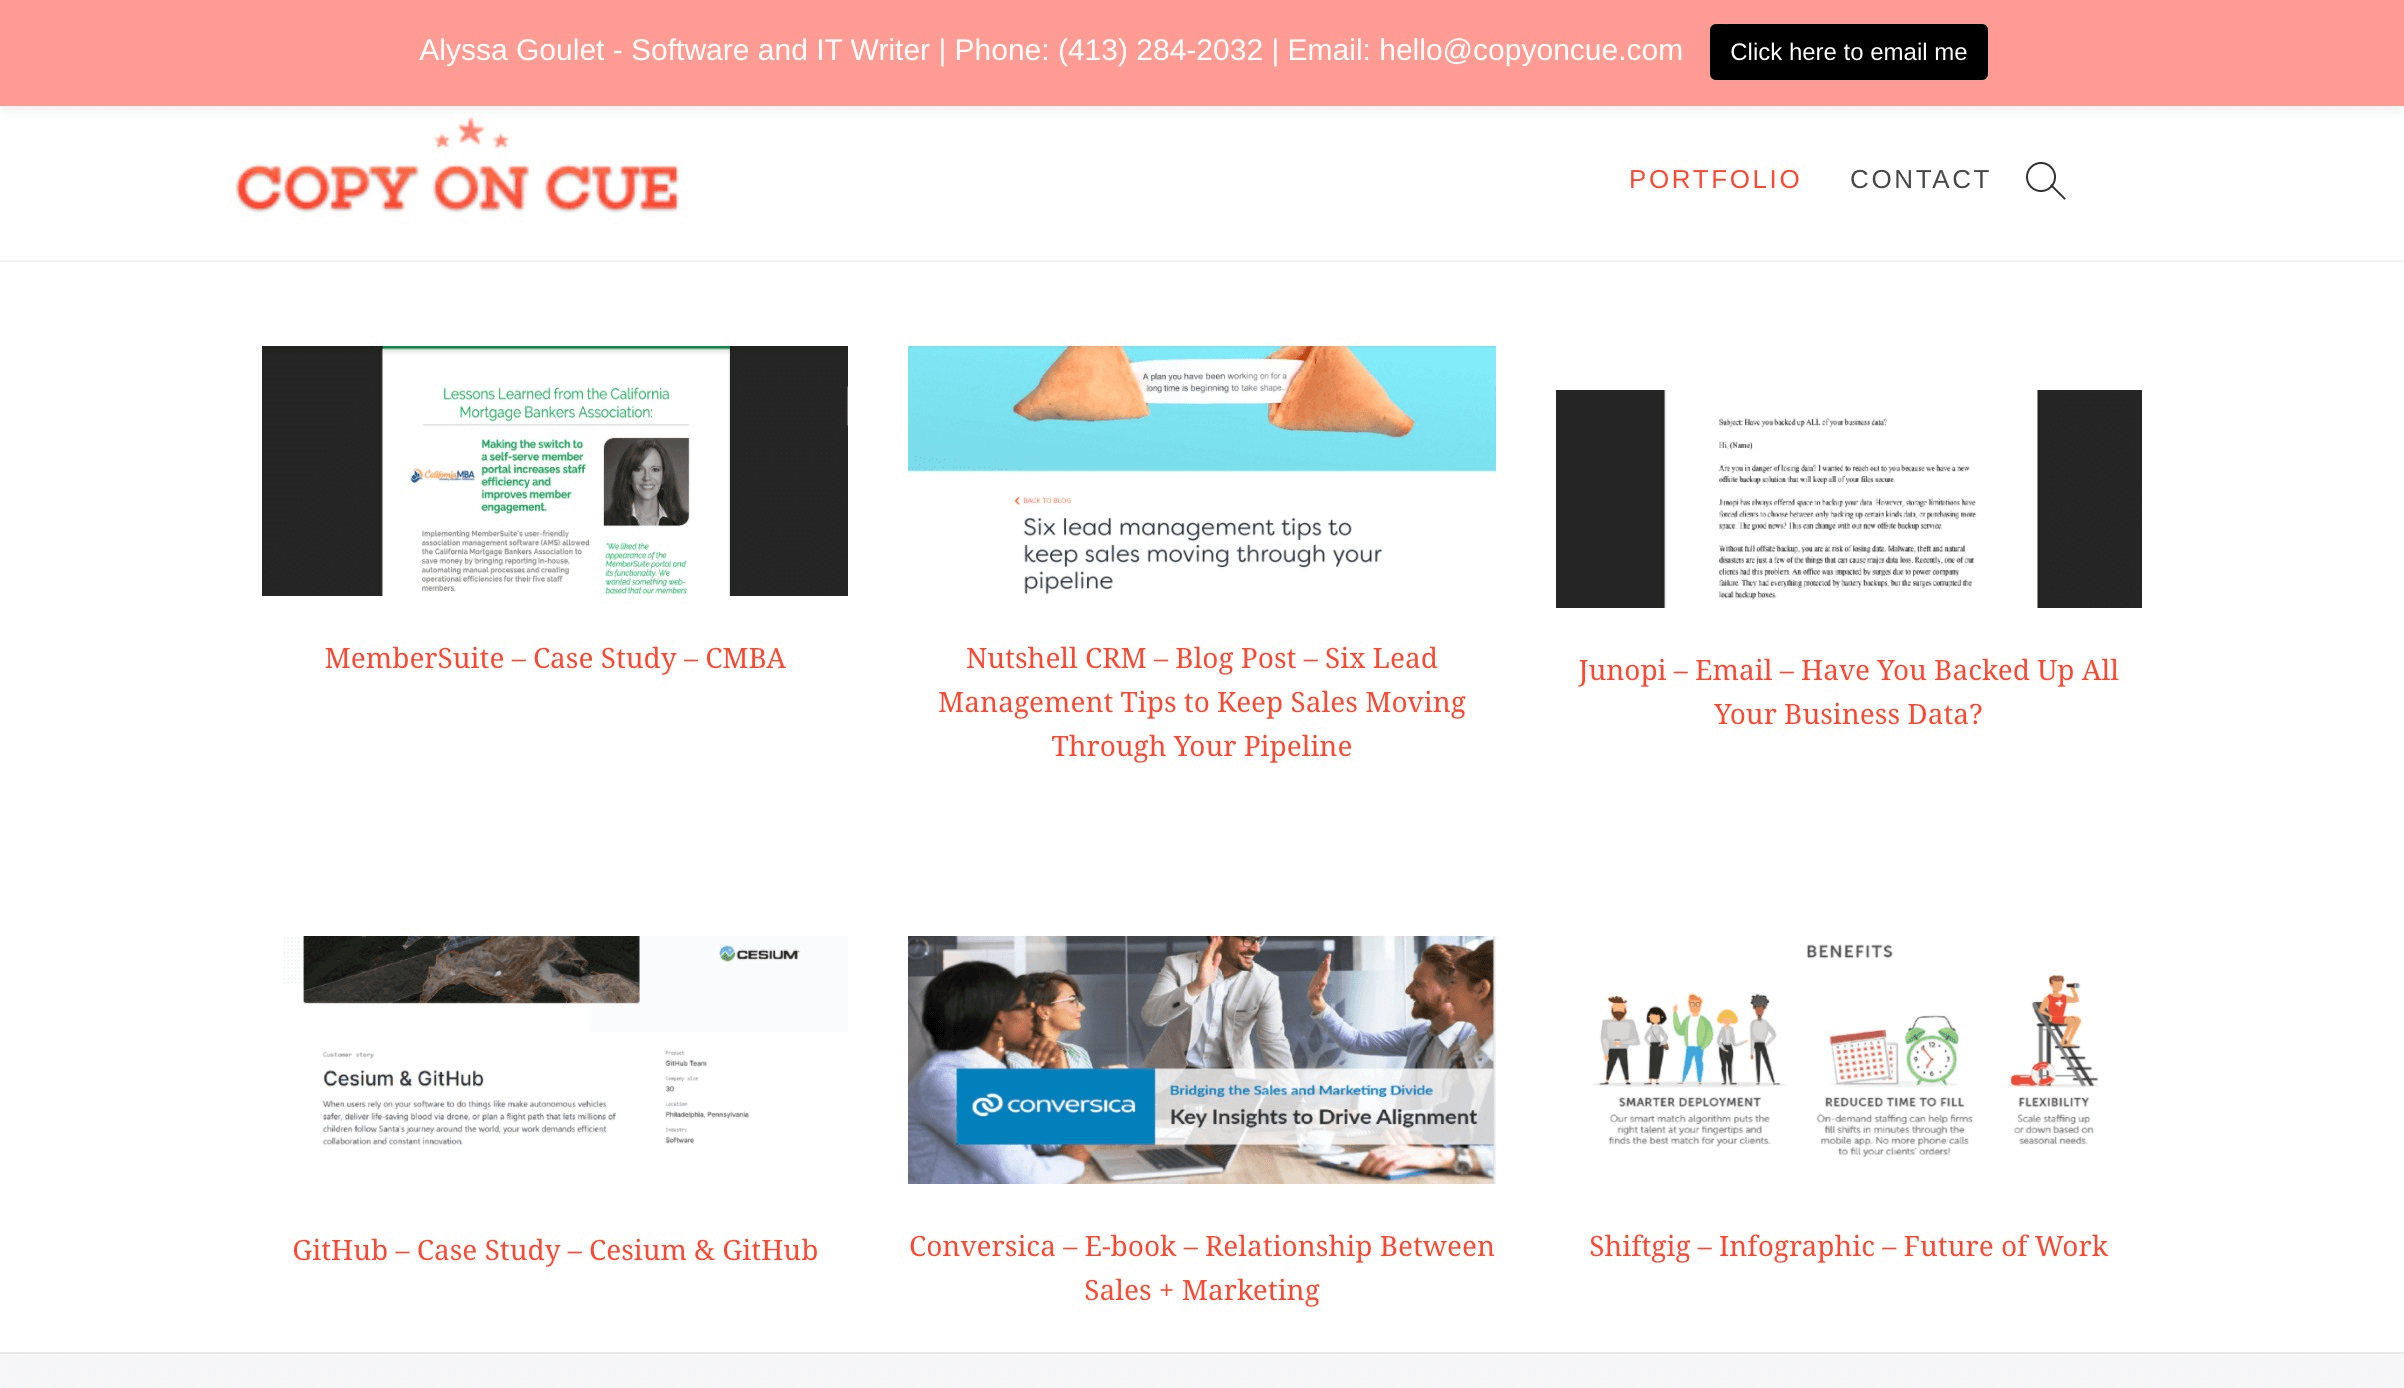
Finally, some clients ask for samples before they will hire you. We actually prefer sharing case studies instead of samples, but until you have a solid case study that shows off your process and thinking, get a portfolio together—with two or three of your strongest pieces that reflect the sort of work you’d like to get more of.
4. Choosing the visuals for your website.

While a lot of website builders and WordPress themes come with their own visuals, you’ll want to replace those default images with something more closely related to your brand. Even better, with photos of you. If at all possible, avoid using obvious stock images or copywriting clichés like hands on a keyboard or quill pens on notebooks. You want to stand out, not blend in.
Fortunately, there are plenty of tools and resources to help you cover your bases for:
• Brand identity basics
• Stock image photos
• Graphics & icons
• Color palettes
Let’s take a look at each one and what’s out there for you to use.
Brand identity basics.
In a perfect world, you’d hire an amazing brand strategist to help you design a full brand identity system for your business, complete with a unique concept, pithy headlines, and creative photography. And you’d end up with something like what Tamara Glick has:

But honestly, given that branding like this can cost thousands of dollars, this is something you should only invest in once you’ve figured out your niche, your X-Factor (see below), and your brand (and when you can afford to make the investment). You do not need a fancy website to get started. In fact, you can get a lot of mileage out of a basic site using the resources listed here.
So to help you customize your website, start with resources like…
Branded photography. Hire a local photographer (or even a friend with an eye for style) to help you put together a small collection of photos to use on your website. Smile. Look at the camera. Imagine you’re connecting with a potential client—how do you look at them? Many copywriters manage just fine with just a couple of pictures of themselves on their websites so you don’t need to go overboard. But getting you on your website is important.
Branded logo. Honestly you don’t need to come up with a fancy logo to get started (a lot of copywriters just use a nice font and color). At this stage you just need something that looks professional and just does the job. That being said, there are a number of cool resources that let you come up with beautiful logo designs for cheap (and even free) that we’ve linked to directly below this section. Pairing a simple icon with a nice readable font will set you aside from thousands of other copywriters who just don’t pay attention to this stuff.
Branded favicon. This is the small icon that shows up on the web browser tab for your website. And while it may seem unimportant given everything else you need to do, it looks a bit unprofessional when your website uses the WordPress logo or another default icon. You won’t lose business over it. But it takes a few seconds to sort out, so why not look your best?
Here are some free and inexpensive resources for branded assets that will save you wasting weeks going back and forth with amateur designers on Fiverr.
Hatchful by Shopify (Get a logo, favicon, and templates just by typing a few keywords.) Canva (An amazing design tool for non-designers that lets you create branded templates.) This tool goes well beyond creating logos and is useful for creating social media graphics and much more. We highly recommend it. Wordmark.it (This one doesn’t create visuals, but it does let you preview text in a variety of fonts so you can get some quick logo ideas.) Click the ones you like to download them.Note: if you’re using a web builder like Wix or Squarespace, they may provide design tools to help you create a logo and favicon. But again, if you leave those platforms you may lose access to your logo files.
High-quality stock photos.
Unless you’re working with a photographer who can get you all the shots you need. you’ll probably need to fill in a few gaps with high-quality stock image photos. Fortunately, there are dozens of stock image libraries (paid and free) that you can use to make sure your website has enough visual punch to it.
But there are rules to using these and violating them can get you in trouble. It can even put you on the hook for paying a photographer hundreds or thousands of dollars.
For example, Adobe Stock has images you can use for commercial purposes, while others can only be used for editorial purposes (and both those classifications have their own set of rules). Flickr has thousands of incredible images taken by photographers around the world… but only some of them are available for commercial use. Many are available under a Creative Commons license that requires attribution. Others are not available at all. So make sure you understand how it all works to avoid any potential (and unnecessary) trouble.
Here are a few sites that provide stock images for purchase and use. Different libraries include different image collections, so when looking for that perfect photo, you may have to shop around a bit:
Deposit Photos — we use this one a lot at The Copywriter Club. Features both free and inexpensive image collections.
Pexels Pixabay Shutterstock Adobe StockGraphics and icons.
In addition to high-quality photography, you may also need a few other visuals in the form of icons and graphics. Especially for sections where you’re detailing a process, it helps to have little visuals that work alongside the copy.
Obviously like stock image photos, there are rules to using these (free and paid). So make sure you’re aware of the terms before you get trigger happy with downloading and using someone else’s hard work.
Between these 3 websites (and Adobe Stock if you’re looking for something more exclusive and premium vectors), you can pretty much find anything you need:
Freepik Flaticon Icons8Color palettes.
While most website builders and templates come with their own color palettes, you may want to customize the one you use to suit your specific tastes. Fortunately, you don’t need to hire a graphic designer or learn color theory to figure things out, as there are a few nifty color palette generators that can help you come up with impressive combinations for your website.
Here are three options that work well and are incredibly easy to use:
Paletton.com (lets you create and preview palettes with just 1 base color) Coolors.co (shows you ideas based on what’s currently trending.) Colorhunt.com (let’s you search palettes using search terms.)
5. Bonus tools that help you attract and engage clients.
 Once you’ve gotten the big building blocks in place for your website in the form of your page layouts, some amazing copy and beautiful visuals, you may want to add a few tools so that you’re connecting with website visitors and adding readers to your email list.
A few things can happen when someone visits your website.
First, they might want to become your customer—this is the best case scenario. In this case, you’ll want to ensure there’s a way for them to share a few details, book an appointment with you, and process a payment.
Or, prospects may just want to leave an email or ask questions. In this case, you’ll want to set up an opt-in, contact form, or another way to get in touch with you directly.
Finally, they may do nothing at all and leave. In this case, you may want to add a tracking tool to gain insights on where people leave your site so you can optimize wherever possible. Or to see if they return again in the future.
Let’s look at a few tools that we see working great for copywriters that you can use as well to cover your bases across those 3 scenarios.
Client intake forms.
All website builders have default form tools you can embed onto your page (or use as pop-ups) to get people to fill in all their details and have it all sent to your inbox. Most of the time, these have a built-in autoresponder tool that links to your email provider and sends a confirmation email once someone fills out your form.
These work fine at a basic level. But most copywriters and online marketers prefer using dedicated form tools to capture leads (there’s a lot more customization and features that make them worth considering).
Our personal favorite is Typeform (we use it for The Copywriter Club and our own personal websites). What’s particularly great about Typeform is that it acts as both an intake form and a survey tool. In fact, it has dozens of uses.
And if surveying is a big part of your customer research process (as it should be), then it’s a great choice given its flexibility. Overall, these 3 tools are worth checking out if you’re looking for a dedicate form tool to use on your website:
Typeform — For tons of features and a beautiful, customizable user experience. JotForm — Unlimited questions on their free plan / less expensive than Typeform. Google Forms — Great if you want everything to auto-populate into a spreadsheet.Live chat and lead capture pop-ups.
While you can manage just fine with traditional forms like those mentioned above, a few copywriters like to add live chat software to help leads connect with them right on their websites. They’re not difficult to install, but they do require you to answer questions as they come in so they’re not great if you like to work in focused, uninterrupted time blocks.
Some of these chat tools even integrate with Slack so you don’t have to keep tabs of your website open. But otherwise, you can settle on a more static format by using pop-up forms that capture people’s emails and requests.
But otherwise, these are some cool options that we see a lot amongst copywriters:
Drift (Popular live chat tool with an incredibly sleek and fluid user experience.) Pure Chat (Offers a lot of features and integrations with other applications.) Pop-Up Ally (provided by Access Ally) A favorite pop-up form tool amongst WordPress users. We use this on The Copywriter Club website.Scheduling software.
Like opt-in forms, the idea with embedded scheduling tools is to maximize the convenience of connecting with you. At the same time, they automate scheduling kickoff calls for any productized or consulting services you might offer. You can even link to Stripe or PayPal if you charge a fee for consultations. And you can also link to Zoom to automatically provide meeting details in the confirmation message.
There is a caveat though… you are allowing strangers to take space on your schedule. However, there are settings for setting up restrictions on how people can book themselves into your calendar. It’s up to you on whether you’re comfortable with that. These are our two top picks:
Acuity Scheduling (Features a client database and can do recurring appointments.)
Calendly (Best for controlling scheduling parameters and user experience.)Payment processors.
There are a number of ways you can get paid for your work with invoicing software and setting up the right accounts with your bank. But in terms of payment processing options that can be embedded onto your website, you’re a bit more limited.
Keep in mind there are different fees and processing times depending on the payment processor you choose. You’ll want to bake these fees into your project expenses. In some jurisdictions it’s illegal to charge your customers credit card processing fees on top of the cost of the project. And even if it’s not illegal where you are, it tends to bother clients who have already agreed to a set fee for the work you do.
These tools make it easy to invoice your clients and get paid:
Wave — Invoicing tools that collect payments for a fee and automatically forwards money to your bank account. No need to integrate with your website. We love this tool.
PayPal — Easy setup and almost everyone uses it. But beware, as its policies favor buyers over sellers and the fees a a bit steep. Stripe — More professional than PayPal and integrates with a lot more tools. Again, be aware of the fees.If you’re from a particular part of the world and have a different setup that allows you to work with clients globally, we’d love to hear from you to add those here in the comments for the benefit of others.
Background data collection.
This is more advanced level stuff here, but if you want data on your web visitors, keep reading… The more data you can gather on your website’s traffic and how visitors interact with your website, the more insights you’ve got on how to improve the overall experience and maximize your conversions.
On the most basic level, all websites should have their Google Analytics and Google Tag Manager set up as soon as possible (it’s free, it’s easy to do, and it’s incredibly valuable). On a more advanced level, there are all sorts of tools out there that can really zero-in on user behavior with specific pages on your site.
A popular tool amongst conversion copywriters and marketers is the heatmap—which provides visual replays on how people interact with specific pages of your website. You can even set up surveys to ask visitors more about their experience. However, these tools are overkill unless you have hundreds of visitors on your site each week.
Google Analytics & Tag Manager (Data collection bread and butter that every website should have.) Hotjar (popular heatmapping tool amongst conversion rate optimization professionals.)
6. Beyond your website… the foundations for a successful online copywriting business.
Getting your website up and live the first time isn’t hard, but it does take a bit of focused effort. Once it’s up, you’ll be in a much better position to start truly building out an amazing and long-lasting copywriting business for yourself.
However… it’s just a start.
If you’re looking to build a truly successful and lasting copywriting business, there’s some serious foundational work worth considering.
Here are two that we usually help new copywriters with…
Nailing your X-Factor.
There are a lot of copywriters in the world—more than half a million on LinkedIn alone. And another 1,720,000 people who claim the title “content writer” or “content strategist”. If you want to stand a chance at standing out from the competition and landing better gigs, you’ll need to hone in your X-Factor—the thing that makes you different, better, memorable and awesome.
It’s an incredibly important foundation to establish inside your business and it’s a training anyone can access inside our membership program in The Copywriter Underground.
Building out profitable processes and packages.
The most successful copywriters are the ones who have got their processes and packages down. Along with knowing your X-Factor, these are foundational building blocks that we help copywriters develop inside our 16-week The Copywriter Accelerator program (along with pricing, client management, business mindset, and getting yourself in front of your ideal clients). We cover it all in The Accelerator. Click that link to learn more.
Is there anything you think is missing from this Ultimate Guide to Creating Your Copywriter Website? Please leave a comment below or email us at help@thecopywriterclub.com.
 Eddie Biroun is a Conversion Copywriter for E-Comm & Education Brands who enjoys the full-funnel approach (because everything matters). He’s had an awesome time kicking ass for brands like The Copywriter Club, The Email Copywriter, Rich Dad Poor Dad & Deadline Funnel. He also enjoys buying books and (sometimes) actually reading them. If you don’t live in Montreal, you can visit him at eddiebiroun.com.
Note: Some of the recommendations in this article link to affiliate offers. That means is if you click and purchase anything at the other side of those links, The Copywriter Club will earn a commission (at no additional cost to you whatsoever). This is an easy way for you to support The Copywriter Club podcast and other programs. And we’re grateful to you for that.